How to Use a Mushroom Grow Bag for Optimal Yield
Mushroom cultivation can be a rewarding hobby or a lucrative commercial venture. Using a mushroom grow bag is one of the simplest ways to start. Whether you're new to mycology or looking to streamline your existing setup, understanding how to effectively utilize a mushroom grow bag is crucial. This guide will walk you through the entire process, ensuring you get the best possible results from your mushroom grow bag.
1. Choosing the Right Mushroom Grow Bag
Selecting the appropriate mushroom grow bag is critical. These bags are specifically designed for different stages of mushroom cultivation, from spawn to fruiting, and choosing correctly can significantly impact your success. Consider the following:
- Material: Most mushroom grow bags are made from polypropylene, suitable for the high heat required for sterilization and resistant to tearing.
- Filter Type: A 0.2-micron filter is ideal for spawn production, while a 0.5-micron filter or 5-micron filter is better suited for fruiting as it allows more fresh air exchange.
- Size: The dimensions of the bag should accommodate the amount of substrate you plan to use. A typical size might be 4” x 3” x 20” for mushroom spawn. For fruiting stages, larger bags are more suitable as they provide ample space not only for the substrate but also for the increased volume that results from adding in the mushroom spawn.
2. Sterilizing Grain for Mushroom Spawn
The first crucial step in mushroom cultivation is preparing your grain spawn to ensure it's free from contaminants. Here's how to sterilize the grain effectively using either an autoclave or a pressure cooker:
- Selecting Your Grain: Begin with a suitable grain such as rye, wheat, milo, or millet.
-
Preparation of Grain:
- Soaking: Begin by soaking the grain in water for 12-24 hours to hydrate it partially. This initial step is crucial as it begins the hydration process, making the grain more amenable to mycelium growth once inoculated.
- Boiling (if necessary): For grains that do not fully hydrate by soaking alone, such as larger or harder grains, proceed to boil them briefly. Simmer the grains for 10-20 minutes until they are fully hydrated but not mushy.
- Draining and Rinsing: After soaking or boiling, thoroughly drain and rinse the grain to remove any excess water and starch.
- Loading the Grow Bag: Transfer the hydrated grain into a mushroom grow bag. We also offer pre-sterilized grain bags, ready for immediate use and guaranteed to maintain the highest standards of sterility and quality.
-
Sterilization:
- Autoclave Method: Place the filled grow bags in an autoclave. Set the autoclave to run at 121 degrees Celsius (250 degrees Fahrenheit) for 90 minutes.
- Pressure Cooker Method: If using a pressure cooker, place the bags inside, ensuring they do not block the steam vent. Cook at 15 psi for 3 hours. Make sure you have enough water in the pressure cooker.
- Cooling the Bags: After sterilization, allow the bags to cool inside the autoclave or pressure cooker until they reach room temperature. It’s crucial to avoid opening the autoclave or cooker early, as the rapid change in temperature can create a vacuum effect. This vacuum draws external air into the sterile environment, potentially introducing contaminants.
3. Preparing Your Substrate
The substrate is what your mushrooms will grow on. Preparation varies by the type of mushroom, but generally involves the following steps:
- Pasteurization: To minimize contamination while maintaining a beneficial microbial environment, pasteurize the substrate by heating it at a lower temperature than sterilization. This process effectively reduces unwanted bacteria and mold spores, but allows beneficial microorganisms to survive, which can aid in the decomposition process essential for healthy mushroom growth.
- Cooling: Let the substrate cool to room temperature to prevent killing the mycelium.
4. Mixing Spawn with Substrate
Inoculation involves adding mushroom spawn to your prepared substrate within the grow bag:
- Mix the Spawn: Evenly distribute the mushroom spawn throughout the substrate inside the mushroom grow bag.
- Seal the Bag: Seal the mushroom grow bag using an impulse sealer to ensure it is airtight, which helps prevent contamination. If you don’t have an impulse sealer, you can fold the top of the bag over three times and secure it with paper clips or binder clips. Make sure to use a clip that is not too heavy, as a heavy clip could cause the top of the bag to fold over, potentially compromising the effectiveness of the filter patches and the integrity of the bag. This method also helps to maintain the integrity of the bag while minimizing the risk of contamination. Ensuring the bag stands upright is crucial for proper gas exchange through the filter patches.
5. Incubating the Substrate
Store the inoculated mushroom grow bag in a dark, warm area. The temperature and conditions will depend on the type of mushroom, but generally, this phase allows the mycelium to colonize the substrate:
- Incubation Period: This can last several weeks to a couple of months and should be monitored for any signs of contamination.
- Incubation (Colonization) Phase: During this initial phase, where the mycelium colonizes the substrate, the ideal temperature should be kept between 75-81°F (24-27°C). This range promotes rapid and healthy mycelial growth.
- The optimal temperature for growth can differ based on the specific mushroom strain.
6. Initiating Fruiting
Once the mycelium has colonized the substrate, you need to change the conditions to encourage fruiting:
- Introduce Light: Expose the bags to natural or artificial light.
- Adjust the Environment: Lower the temperature and increase humidity to trigger mushroom growth.
7. Harvesting
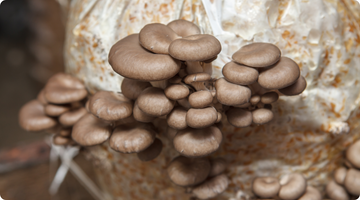
Mushrooms are ready to harvest when the caps fully open but before they release spores:
- Harvest Method: There are two common methods to harvest mushrooms: cutting and twisting. Use a sharp knife to carefully cut the mushrooms at the base to avoid disturbing the mycelium in the substrate, which is especially important for varieties that can produce multiple flushes from the same mycelium. Alternatively, you can gently twist and pull the mushrooms out. This method is often easier and quicker, but it’s important to twist carefully to minimize damage to the mycelium. Whichever method you choose, ensure it’s done gently to maintain the integrity of the mycelium for future growth.
8. Post-Harvest
Depending on the type of mushroom, the substrate in your mushroom grow bag may support additional flushes:
- Continue Care: Maintain appropriate light, temperature, and humidity to encourage further growth.
Conclusion
Mushroom grow bags offer a convenient and effective method for mushroom cultivation. By following these steps, you can maximize the productivity and health of your mushrooms. With the right care and conditions, your mushroom grow bag can be the gateway to a bountiful mushroom harvest.
Remember, each mushroom species has its specific requirements, so it’s essential to adjust your approach accordingly. Good luck with your mushroom cultivation journey!

